demo_robot
Load a STEP file and simulate a robot (demo_CAS_robot.cpp)
This demos is obsolete and should undergo deep interventions to be updated to latest Chrono version.
Tutorial that teaches how to use theCASCADE module to load a 6-DOF robot saved in a STEP file as an assembly, exported from a CAD model.
This is an advanced tutorial that shows how to load complex 3D models that have been saved inSTEP file format from professional 3D CAD software.
Most high-end 3D CAD software can save assemblies and parts in STEP format. Among the most used CAD software, we citeCATIA,SolidEdge,SolidWorks,PTC Pro/E, etc. The following tutorial is based on SolidEdge, but it can be adapted to other CADs with minor modifications.
Prepare a STEP file
The CASCADE module is able to directly parse sub-assemblies and sub-parts that have been saved into a single STEP file. However, it is better to prepare the assembly with certain guidelines, before saving it: noticeably, we will put some 'auxiliary' objects in the assembly (the markers) that we will use from the C++ programming side in order to retrieve useful coordinates for building the constraints between the parts. This process is explained in the folowing example.
Creating a demo mechanism (a car, a robot, etc.) might take hours. To make things simplier, we load a ready-to-use model that can be downloaded from the website of a manufaturer of industrial robots, see [download page](http://www.abb.com/product/seitp327/5356453900282c5cc1256efc0028d55d.aspx?productLanguage=us&country=00&tabKey=7 ) from the [ABB](www.abb.com) website. We downloaded the 3D model for the IRB 7600 robot: by the way it is already in STEP format, so it could be loaded directly by the CASCADE unit, but we prefer to mofify it in SolidEdge and save it again.
Start SolidEdge (we use the v18 version in this example)
Menu File / Open...
Choose the STEP (.stp or .step) file of the robot, as downloaded from the ABB site.
In the 'New' window, in the 'General' tab, select 'Normal.asm' to let SolidEdge create an assembly from the STEP file
Press OK. After the conversion, SolidEdge created the assembly. Look into the directory of your STEP file: SolidEdge created its .asm and many .part files. The Assembly PathFinder panel, to the right, shows all the parts in the assembly:
Note that the assembly is made of many parts. Maybe that there is not a one-to-one correspondence from rigid bodies for our simulation, and CAD parts, so we want to organize N sub-assemblies, that represent our N rigid bodies in the simulation. That is, it would be nice if each part stays in a separate sub-assebly that represents a 'rigid body', and such subassemblies can optionally contain some auxiliary objects (we call them 'markers') that can be used later on the C++ side to find the position of the joints.
To make the sub assembles:
Select the 'Parts library' panel,
press button 'Create in Place' to open the create window,
set 'Normal.asm' as Template
set 'Base' (or 'Forearm', or other meaningful name) in 'New file name',
browse to your directory where you have all other assembly files, in 'New file location',
menu File / Close and return, to go back to general assembly.
Repeat the last steps to create the other subassemblies, named for example 'Bicep', 'Forearm', 'Wrist', etc.
The created subassemblies are still empty. So we must move the imported parts into them. Drag and drop a part from parent assembly to a child asembly does not work in SolidEdge v.18, yet a simple way to do this is to
select the part in the parent assembly,
press Ctrl+C to copy,
then select the sublevel in the Assembly PathFinder,
use 'Edit' from popup-menu,
press Ctrl-V to paste it,
then go back to parent assembly with menu 'File / Close and return'.
Repeat this until you have all the parts in their separate subassemblies. Some subassembly might have multiple parts. Look our example:
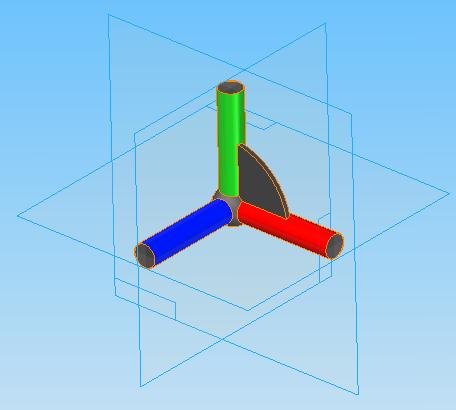
Now we add an auxiliary part in all subassemblies, to represent the coordinates where you want the constraints (links, motors, ..) to be created using C++ functions. These are like 'placeholders'. To do so, we create a 'marker.par' part, such as the one in the following figure:
We insert this marker part in all subassemblies, properly aligned to all the joints:
At the end, the Assembly PathFinder panel should show something like the following:
Select the base assembly, use the menu File / Save as.. and choose STEP as file format, then save the entire assembly.
Quit the SolidEdge software.
Write C++ code to load the model
The key of the remaining process is the functionality of the ChCascadeDoc class. Such class has the functionality of loading sub-assemblies from a STEP file by using the function mydoc.GetNamedShape(...)
that takes, as argument, the ASCII name of the subassembly (or sub part).
A small inconvenience happens here: because of a SolidEdge-specific issue, the names of the subassemblies in the STEP file are not always the same names that you read in the Assembly PAthFinder window. In detail, all the names of the assemblies are automatically translated to Assem1
, Assem2
, etc., whereas you would expect the names of the assemblies that you created, such as Base
, Turret
, etc.
A workaround to this inconvenience is the following: you use the mydoc.Dump(std::cout)
function to print the hierarchy on the console and take note of the STEP names on a piece of paper (or just use the demo_converter.exe to show that hierarchy), you will see something like:
-Name :Assem10 (root)
pos at: 0 0 0 (absolute)
pos at: 0 0 0 (.Location)
-Name :Assem8
pos at: 0 0 0 (absolute)
pos at: 0 0 0 (.Location)
-Name :IRB7600_23_500_m2000_rev1_01-1
pos at: 0 0 0 (absolute)
pos at: 0 0 0 (.Location)
-Name :marker
pos at: 2.29901e-035 -2.99071e-036 0.2185 (absol
pos at: 2.29901e-035 -2.99071e-036 0.2185 (.Loca
-Name :Assem4
pos at: 0 0 0 (absolute)
pos at: 0 0 0 (.Location)
-Name :IRB7600_23_500_m2000_rev1_01-2
pos at: 0 0 0 (absolute)
pos at: 0 0 0 (.Location)
-Name :marker
pos at: 3.88578e-015 -2.66454e-015 0.2135 (absol
pos at: 3.88578e-015 -2.66454e-015 0.2135 (.Loca
-Name :marker
pos at: 0.41 -0.049 0.78 (absolute)
pos at: 0.41 -0.049 0.78 (.Location)
-Name :marker
pos at: -0.38 -0.03 0.6545 (absolute)
pos at: -0.38 -0.03 0.6545 (.Location)
-Name :Assem1
.... etc. etc. .... ........
From the example above, you see that Base
has become Assem8
, Turret
has become Assem4
, and so on. (luckily enough, SolidEdge did not change the name of the parts, only the assembly names were changed). Take note of this on a sheet of paper.
Now, let's develop the C++ program that loads the robot model and simulates it.
First of all, include the needed libraries (note the unit_CASCADE/... headers) and use the proper namespaces:
#include "physics/CHapidll.h"
#include "core/CHrealtimeStep.h"
#include "irrlicht_interface/CHirrAppInterface.h"
#include "irrlicht_interface/CHbodySceneNodeTools.h"
#include "unit_CASCADE/CHcascadeDoc.h"
#include "unit_CASCADE/CHCascadeMeshTools.h"
#include "unit_CASCADE/CHirrCascadeMeshTools.h"
#include "unit_CASCADE/CHirrCascade.h"
#include "irrlicht_interface/CHbodySceneNode.h"
#include <irrlicht.h>
// Use the namespace of Chrono
using namespace chrono;
// Use the main namespaces of Irlicht
using namespace irr;
using namespace core;
using namespace scene;
using namespace video;
using namespace io;
using namespace gui;
// Use the namespace with OpenCascade stuff
using namespace cascade;
Here is the program (a simple demo where the robot is created from the STEP file, constraints are added, and the robot simulation is displayed while moving on a simple trajectory).
int main(int argc, char* argv[])
{
ChGlobals* GLOBAL_Vars = DLL_CreateGlobals();
// 1- Create a Chrono physical system: all bodies and constraints
// will be handled by this ChSystem object.
ChSystem my_system;
// Create the Irrlicht visualization (open the Irrlicht device,
// bind a simple user interface, etc. etc.)
ChIrrAppInterface application(&my_system, L"Load a robot model from STEP file",core::dimension2d<u32>(800,600),false, true, video::EDT_OPENGL);
// Easy shortcuts to add logo, camera, lights and sky in Irrlicht scene:
//ChIrrWizard::add_typical_Logo(application.GetDevice());
ChIrrWizard::add_typical_Sky(application.GetDevice());
ChIrrWizard::add_typical_Lights(application.GetDevice(), core::vector3df(30,100,30), core::vector3df(30,-80,-30),200,130);
ChIrrWizard::add_typical_Camera(application.GetDevice(), core::vector3df(0.2,1.6,-3.5));
Create the ChCascadeDoc, a container that loads the STEP model and manages its subassembles. Also, prepare some pointers for bodies that will be created.
ChCascadeDoc mydoc;
Also, prepare some pointers for bodies that will be created.
ChBodySceneNodeAuxRef* mrigidBody_base = 0;
ChBodySceneNodeAuxRef* mrigidBody_turret = 0;
ChBodySceneNodeAuxRef* mrigidBody_bicep = 0;
ChBodySceneNodeAuxRef* mrigidBody_elbow = 0;
ChBodySceneNodeAuxRef* mrigidBody_forearm = 0;
ChBodySceneNodeAuxRef* mrigidBody_wrist = 0;
ChBodySceneNodeAuxRef* mrigidBody_hand = 0;
ChBodySceneNodeAuxRef* mrigidBody_cylinder = 0;
ChBodySceneNodeAuxRef* mrigidBody_rod = 0;
Load the STEP model using this command: (be sure to have the STEP file on the hard disk)
bool load_ok = mydoc.Load_STEP("..\\data\\cascade\\IRB7600_23_500_m2000_rev1_01_decorated.stp");
Print the contained shapes, showing the assembly hierarchy:
mydoc.Dump(std::cout);
ChCollisionModel::SetDefaultSuggestedEnvelope(0.002);
ChCollisionModel::SetDefaultSuggestedMargin(0.001);
// In most CADs the Y axis is horizontal, but we want it vertical.
// So define a root transformation for rotating all the imported objects.
ChQuaterniond rotation1;
rotation1.QuatFromAngleAxis(-CH_PI/2, VECT_X); // 1: rotate 90° on X axis
ChQuaterniond rotation2;
rotation2.QuatFromAngleAxis(CH_PI, VECT_Y); // 2: rotate 180° on vertical Y axis
ChQuaterniond tot_rotation = rotation2 % rotation1; // rotate on 1 then on 2, using quaternion product
ChFrameMoving<> root_frame( ChVector3d(0,0,0), tot_rotation);
Retrieve some sub shapes from the loaded model, using the GetNamedShape() function, that can use path/subpath/subsubpath/part syntax and * or ? wldcards, etc. Using the / slash is like addressing a Unix directory (in fact the STEP file is organized like a directory with subdirectory, each representing a subassembly).
if (load_ok)
{
TopoDS_Shape shape_base;
if (mydoc.GetNamedShape(shape_base, "Assem10/Assem8" ))
{
// Add the shape to the Irrlicht system, to get also visualization.
mrigidBody_base = (ChBodySceneNodeAuxRef*)addChBodySceneNode_Cascade_C(
&my_system, application.GetSceneManager(),
shape_base);
// The base is fixed to the ground
mrigidBody_base->GetBody()->SetFixed(true);
// Move the body as for global displacement/rotation by pre-transform its coords.
// Note, it could be written also as mrigidBody_base->GetBody() %= root_frame;
mrigidBody_base->GetBody()->ConcatenatePreTransformation(root_frame);
}
else std::cout << "Warning. Desired object not found in document \n";
TopoDS_Shape shape_turret;
if (mydoc.GetNamedShape(shape_turret, "Assem10/Assem4" ))
{
// Add the shape to the Irrlicht system, to get also visualization.
mrigidBody_turret = (ChBodySceneNodeAuxRef*)addChBodySceneNode_Cascade_C(
&my_system, application.GetSceneManager(),
shape_turret);
// Move the body as for global displacement/rotation
mrigidBody_turret->GetBody()->ConcatenatePreTransformation(root_frame);
}
else std::cout << "Warning. Desired object not found in document \n";
TopoDS_Shape shape_bicep;
if (mydoc.GetNamedShape(shape_bicep, "Assem10/Assem1" ))
{
// Add the shape to the Irrlicht system, to get also visualization.
mrigidBody_bicep = (ChBodySceneNodeAuxRef*)addChBodySceneNode_Cascade_C(
&my_system, application.GetSceneManager(),
shape_bicep);
// Move the body as for global displacement/rotation
mrigidBody_bicep->GetBody()->ConcatenatePreTransformation(root_frame);
}
else std::cout << "Warning. Desired object not found in document \n";
TopoDS_Shape shape_elbow;
if (mydoc.GetNamedShape(shape_elbow, "Assem10/Assem5" ))
{
// Add the shape to the Irrlicht system, to get also visualization.
mrigidBody_elbow = (ChBodySceneNodeAuxRef*)addChBodySceneNode_Cascade_C(
&my_system, application.GetSceneManager(),
shape_elbow);
// Move the body as for global displacement/rotation
mrigidBody_elbow->GetBody()->ConcatenatePreTransformation(root_frame);
}
else std::cout << "Warning. Desired object not found in document \n";
TopoDS_Shape shape_forearm;
if (mydoc.GetNamedShape(shape_forearm, "Assem10/Assem7" ))
{
// Add the shape to the Irrlicht system, to get also visualization.
mrigidBody_forearm = (ChBodySceneNodeAuxRef*)addChBodySceneNode_Cascade_C(
&my_system, application.GetSceneManager(),
shape_forearm);
// Move the body as for global displacement/rotation
mrigidBody_forearm->GetBody()->ConcatenatePreTransformation(root_frame);
}
else std::cout << "Warning. Desired object not found in document \n";
TopoDS_Shape shape_wrist;
if (mydoc.GetNamedShape(shape_wrist, "Assem10/Assem6" ))
{
// Add the shape to the Irrlicht system, to get also visualization.
mrigidBody_wrist = (ChBodySceneNodeAuxRef*)addChBodySceneNode_Cascade_C(
&my_system, application.GetSceneManager(),
shape_wrist);
// Move the body as for global displacement/rotation
mrigidBody_wrist->GetBody()->ConcatenatePreTransformation(root_frame);
}
else std::cout << "Warning. Desired object not found in document \n";
TopoDS_Shape shape_hand;
if (mydoc.GetNamedShape(shape_hand, "Assem10/Assem9" ))
{
// Add the shape to the Irrlicht system, to get also visualization.
mrigidBody_hand = (ChBodySceneNodeAuxRef*)addChBodySceneNode_Cascade_C(
&my_system, application.GetSceneManager(),
shape_hand);
//mrigidBody_hand->GetBody()->SetFixed(true);
// Move the body as for global displacement/rotation
mrigidBody_hand->GetBody()->ConcatenatePreTransformation(root_frame);
}
else std::cout << "Warning. Desired object not found in document \n";
TopoDS_Shape shape_cylinder;
if (mydoc.GetNamedShape(shape_cylinder, "Assem10/Assem3" ))
{
// Add the shape to the Irrlicht system, to get also visualization.
mrigidBody_cylinder = (ChBodySceneNodeAuxRef*)addChBodySceneNode_Cascade_C(
&my_system, application.GetSceneManager(),
shape_cylinder);
// Move the body as for global displacement/rotation
mrigidBody_cylinder->GetBody()->ConcatenatePreTransformation(root_frame);
}
else std::cout << "Warning. Desired object not found in document \n";
TopoDS_Shape shape_rod;
if (mydoc.GetNamedShape(shape_rod, "Assem10/Assem2" ))
{
// Add the shape to the Irrlicht system, to get also visualization.
mrigidBody_rod = (ChBodySceneNodeAuxRef*)addChBodySceneNode_Cascade_C(
&my_system, application.GetSceneManager(),
shape_rod);
// Move the body as for global displacement/rotation
mrigidBody_rod->GetBody()->ConcatenatePreTransformation(root_frame);
}
else std::cout << "Warning. Desired object not found in document \n";
}
else std::cout << "Warning. Desired STEP file could not be opened/parsed \n";
if (!mrigidBody_base ||
!mrigidBody_turret ||
!mrigidBody_bicep ||
!mrigidBody_elbow ||
!mrigidBody_forearm ||
!mrigidBody_wrist ||
!mrigidBody_hand )
{
DLL_DeleteGlobals();
return 0;
}
Create joints between two parts. To understand where is the axis of the joint, we can exploit the fact that in the STEP file that we prepared for this demo, we inserted some objects called 'marker' and we placed them aligned to the shafts, so now we can fetch them and get their position/rotation.
Important! In the STEP file, some subassemblies have multiple instances of the marker, so there could be two or more shapes with the same name marker... how to select the desired one? The GetNamedShape() function has a feature for addressing this: you can use the # character followed by a number, so for example Assem10/Assem8/marker#2 means: get the 2nd instance of the shape called "marker" from the subassembly "Assem8" of assembly "Assem10".
TopoDS_Shape shape_marker;
ChFramed frame_marker_base_turret;
if (mydoc.GetNamedShape(shape_marker, "Assem10/Assem8/marker#1" ))
ChCascadeDoc::FromCascadeToChrono(shape_marker.Location(), frame_marker_base_turret);
else std::cout << "Warning. Desired marker not found in document \n";
// Transform the abs coordinates of the marker because everything was rotated/moved by 'root_frame' :
frame_marker_base_turret %= root_frame;
auto my_link1 = chrono_types::make_shared<ChLinkLockRevolute>();
ChSharedBodyPtr mb1 = mrigidBody_base->GetBody();
ChSharedBodyPtr mb2 = mrigidBody_turret->GetBody();
my_link1->Initialize(mb1, mb2, frame_marker_base_turret);
my_system.AddLink(my_link1);
ChFramed frame_marker_turret_bicep;
if (mydoc.GetNamedShape(shape_marker, "Assem10/Assem4/marker#2" ))
ChCascadeDoc::FromCascadeToChrono(shape_marker.Location(), frame_marker_turret_bicep);
else std::cout << "Warning. Desired marker not found in document \n";
frame_marker_turret_bicep %= root_frame;
auto my_link2 = chrono_types::make_shared<ChLinkLockRevolute>();
mb1 = mrigidBody_turret->GetBody();
mb2 = mrigidBody_bicep->GetBody();
my_link2->Initialize(mb1, mb2, frame_marker_turret_bicep);
my_system.AddLink(my_link2);
ChFramed frame_marker_bicep_elbow;
if (mydoc.GetNamedShape(shape_marker, "Assem10/Assem1/marker#2" ))
ChCascadeDoc::FromCascadeToChrono(shape_marker.Location(), frame_marker_bicep_elbow);
else std::cout << "Warning. Desired marker not found in document \n";
frame_marker_bicep_elbow %= root_frame;
auto my_link3 = chrono_types::make_shared<ChLinkLockRevolute>();
mb1 = mrigidBody_bicep->GetBody();
mb2 = mrigidBody_elbow->GetBody();
my_link3->Initialize(mb1, mb2, frame_marker_bicep_elbow);
my_system.AddLink(my_link3);
ChFramed frame_marker_elbow_forearm;
if (mydoc.GetNamedShape(shape_marker, "Assem10/Assem5/marker#2" ))
ChCascadeDoc::FromCascadeToChrono(shape_marker.Location(), frame_marker_elbow_forearm);
else std::cout << "Warning. Desired marker not found in document \n";
frame_marker_elbow_forearm %= root_frame;
auto my_link4 = chrono_types::make_shared<ChLinkLockRevolute>();
mb1 = mrigidBody_elbow->GetBody();
mb2 = mrigidBody_forearm->GetBody();
my_link4->Initialize(mb1, mb2, frame_marker_elbow_forearm);
my_system.AddLink(my_link4);
ChFramed frame_marker_forearm_wrist;
if (mydoc.GetNamedShape(shape_marker, "Assem10/Assem7/marker#2" ))
ChCascadeDoc::FromCascadeToChrono(shape_marker.Location(), frame_marker_forearm_wrist);
else std::cout << "Warning. Desired marker not found in document \n";
frame_marker_forearm_wrist %= root_frame;
auto my_link5 = chrono_types::make_shared<ChLinkLockRevolute>();
mb1 = mrigidBody_forearm->GetBody();
mb2 = mrigidBody_wrist->GetBody();
my_link5->Initialize(mb1, mb2, frame_marker_forearm_wrist);
my_system.AddLink(my_link5);
ChFramed frame_marker_wrist_hand;
if (mydoc.GetNamedShape(shape_marker, "Assem10/Assem6/marker#2" ))
ChCascadeDoc::FromCascadeToChrono(shape_marker.Location(), frame_marker_wrist_hand);
else std::cout << "Warning. Desired marker not found in document \n";
frame_marker_wrist_hand %= root_frame;
auto my_link6 = chrono_types::make_shared<ChLinkLockRevolute>();
mb1 = mrigidBody_wrist->GetBody();
mb2 = mrigidBody_hand->GetBody();
my_link6->Initialize(mb1, mb2, frame_marker_wrist_hand);
my_system.AddLink(my_link6);
ChFramed frame_marker_turret_cylinder;
if (mydoc.GetNamedShape(shape_marker, "Assem10/Assem4/marker#3" ))
ChCascadeDoc::FromCascadeToChrono(shape_marker.Location(), frame_marker_turret_cylinder);
else std::cout << "Warning. Desired marker not found in document \n";
frame_marker_turret_cylinder %= root_frame;
auto my_link7 = chrono_types::make_shared<ChLinkLockRevolute>();
mb1 = mrigidBody_turret->GetBody();
mb2 = mrigidBody_cylinder->GetBody();
my_link7->Initialize(mb1, mb2, frame_marker_turret_cylinder);
my_system.AddLink(my_link7);
ChFramed frame_marker_cylinder_rod;
if (mydoc.GetNamedShape(shape_marker, "Assem10/Assem3/marker#2" ))
ChCascadeDoc::FromCascadeToChrono(shape_marker.Location(), frame_marker_cylinder_rod);
else std::cout << "Warning. Desired marker not found in document \n";
frame_marker_cylinder_rod %= root_frame;
ChSharedPtr<ChLinkLockCylindrical> my_link8(new ChLinkLockCylindrical);
mb1 = mrigidBody_cylinder->GetBody();
mb2 = mrigidBody_rod->GetBody();
my_link8->Initialize(mb1, mb2, frame_marker_cylinder_rod);
my_system.AddLink(my_link8);
ChFramed frame_marker_rod_bicep;
if (mydoc.GetNamedShape(shape_marker, "Assem10/Assem2/marker#2" ))
ChCascadeDoc::FromCascadeToChrono(shape_marker.Location(), frame_marker_rod_bicep);
else std::cout << "Warning. Desired marker not found in document \n";
frame_marker_rod_bicep %= root_frame;
ChSharedPtr<ChLinkLockCylindrical> my_link9(new ChLinkLockCylindrical);
mb1 = mrigidBody_rod->GetBody();
mb2 = mrigidBody_bicep->GetBody();
my_link9->Initialize(mb1, mb2, frame_marker_rod_bicep);
my_system.AddLink(my_link9);
Add a couple of markers for the 'lock' constraint between the hand and the absolute reference: when we will move the marker in absolute reference, the hand will follow it.
This is a very simple way of performing the IK (Inverse Kinematics) of a robot, and it can be used to whatever type of robot, even parallel manipulators or complex kinematic chains, without the need of knowing the analytic expression of the IK.
ChSharedMarkerPtr my_marker_hand(new ChMarker);
ChSharedMarkerPtr my_marker_move(new ChMarker);
mrigidBody_hand->GetBody()->AddMarker(my_marker_hand);
mrigidBody_base->GetBody()->AddMarker(my_marker_move);
ChQuaterniond rot_on_x; rot_on_x.QuatFromAngleAxis(CH_PI/2, VECT_X);
ChFramed frame_marker_move = ChFramed(VNULL, rot_on_x) >> frame_marker_wrist_hand ;
my_marker_hand->ImposeAbsoluteTransform( frame_marker_wrist_hand);
my_marker_move->ImposeAbsoluteTransform( frame_marker_move);
ChSharedPtr<ChLinkLockLock> my_link_teacher(new ChLinkLockLock);
my_link_teacher->Initialize(my_marker_hand, my_marker_move);
my_system.AddLink(my_link_teacher);
Set motions for Z and Y coordinates of the 'my_link_teacher' marker, so that the hand will follow it. To do so, we create four segments of motion for Z coordinate and four for Y coordinate, we join them with ChFunctionSequence and we repeat sequence by ChFunctionRepeat
ChFunctionConstAcc* motlaw_z1 = new ChFunctionConstAcc();
motlaw_z1->SetDisplacement(-0.7);
motlaw_z1->SetDuration(1);
ChFunctionConst* motlaw_z2 = new ChFunctionConst();
ChFunctionConstAcc* motlaw_z3 = new ChFunctionConstAcc();
motlaw_z3->SetDisplacement( 0.7);
motlaw_z3->SetDuration(1);
ChFunctionConst* motlaw_z4 = new ChFunctionConst();
ChFunctionSequence* motlaw_z_seq = new ChFunctionSequence();
motlaw_z_seq->InsertFunct(motlaw_z1, 1, 1, true);
motlaw_z_seq->InsertFunct(motlaw_z2, 1, 1, true); // true = force c0 continuity, traslating fx
motlaw_z_seq->InsertFunct(motlaw_z3, 1, 1, true);
motlaw_z_seq->InsertFunct(motlaw_z4, 1, 1, true);
ChFunctionRepeat* motlaw_z = new ChFunctionRepeat();
motlaw_z->SetRepeatedFunction(motlaw_z_seq);
motlaw_z->SetSliceWidth(4);
ChFunctionConst* motlaw_y1 = new ChFunctionConst();
ChFunctionConstAcc* motlaw_y2 = new ChFunctionConstAcc();
motlaw_y2->SetDisplacement(-0.6);
motlaw_y2->SetDuration(1);
ChFunctionConst* motlaw_y3 = new ChFunctionConst();
ChFunctionConstAcc* motlaw_y4 = new ChFunctionConstAcc();
motlaw_y4->SetDisplacement(0.6);
motlaw_y4->SetDuration(1);
ChFunctionSequence* motlaw_y_seq = new ChFunctionSequence();
motlaw_y_seq->InsertFunct(motlaw_y1, 1, 1, true);
motlaw_y_seq->InsertFunct(motlaw_y2, 1, 1, true); // true = force c0 continuity, traslating fx
motlaw_y_seq->InsertFunct(motlaw_y3, 1, 1, true);
motlaw_y_seq->InsertFunct(motlaw_y4, 1, 1, true);
ChFunctionRepeat* motlaw_y = new ChFunctionRepeat();
motlaw_y->SetRepeatedFunction(motlaw_y_seq);
motlaw_y->SetSliceWidth(4);
my_marker_move->SetMotionZ(motlaw_z);
my_marker_move->SetMotionY(motlaw_y);
// Create a large cube as a floor.
ChBodySceneNode* mfloor = (ChBodySceneNode*)addChBodySceneNode_easyBox(
&my_system, application.GetSceneManager(),
1000.0,
ChVector3d(0,-0.6,0),
ChQuaternion<>(1,0,0,0),
ChVector3d(20,1,20) );
mfloor->GetBody()->SetFixed(true);
mfloor->GetBody()->EnableCollision(true);
video::ITexture* cubeMap = application.GetVideoDriver()->getTexture("../data/blu.png");
mfloor->setMaterialTexture(0, cubeMap);
Modify the settings of the solver. By default, the solver might not have sufficient precision to keep the robot joints 'mounted'. Expecially, the SOR, SSOR and other fixed point methods cannot simulate well this robot problem because the mass of the last body in the kinematic chain, i.e. the hand, is very low when compared to other bodies, so the convergence of the solver would be bad when 'pulling the hand' as in this 'teaching mode' IK. So switch to a more precise solver; this SOLVER_ITERATIVE_MINRES is fast and precise (although it is not fit for frictional collisions):
my_system.SetLcpSolverType(ChSystem::SOLVER_MINRES);
Now, finally, run the loop of the simulator: here are snapshots from the real-time simulator:

Here is the full source code:
\include demo_CAS_robot.cpp
Last updated